
Keycap mold 3D print techniques allow makers to bypass expensive commercial silicone molds and create custom keys easily. Today, Resin Lamp LLC shares the ultimate workflow for both FDM and resin 3D printers. Get ready to elevate your keyboard setup with unique, handmade artisan designs.
Custom Keyboards | The Obsession with Artisan Keycaps
Keycap mold 3D print technology has taken the mechanical keyboard community by storm as customization becomes a massive global phenomenon. Today’s enthusiasts no longer want standard factory setups; they view their desktops as a canvas for true self-expression. This intense drive for personalization has created a booming market for high-end, custom keyboard aesthetics.
Within this thriving culture, hunting for artisan keycaps has become the ultimate pursuit for passionate collectors. These miniature, hand-crafted pieces of art are usually released in limited batches and sell out instantly. Owning a rare artisan keycap is now the definitive way to add a unique, personal touch to any keyboard setup.

Keycap Mold 3D Print: Close-up shot of a limited-edition hand-crafted artisan keycap with intricate resin details
The required ingredients for perfect resin casting
To start a keycap mold 3D print project at home, you do not need expensive machines or complex factory setups; you can easily craft your own artisan keycaps using these simple hand-crafted tools and materials:
- A ready-made 3D printed keycap mold: You don’t need a 3D printer at home; simply download a free design online (like Z-butt) and use a local 3D printing service to print the plastic mold parts for you.
- Two-part epoxy resin: Look for a basic, easy-to-mix 1:1 clear epoxy resin available at any hardware or craft store to pour into your mold.
- A jar of vaseline: No need for professional industrial sprays; a tiny tub of petroleum jelly (Vaseline) acts as a perfect DIY mold release agent to keep the resin from sticking to the plastic.
- Wooden stir sticks and plastic cups: Simple, disposable plastic cups and ice cream wooden sticks are all you need to manually mix your resin colors and glitters.
- A fine toothbrush and sandpaper: A piece of fine grit sandpaper and an old toothbrush are perfect for smoothing out the rough edges of your keycap by hand.
- Basic safety wear: Just grab a standard pair of rubber gloves and open your windows for good ventilation while mixing the resin.
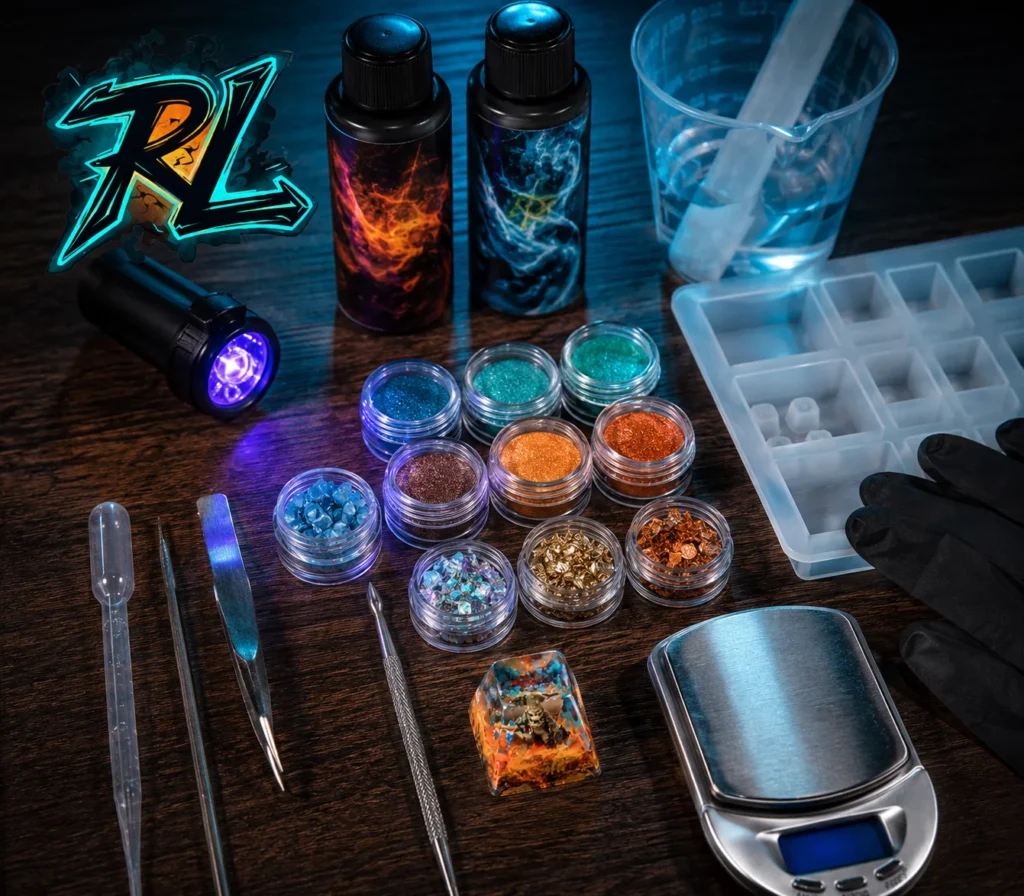
Keycap Mold 3D Print: A collection of handmade crafting materials and simple tools arranged on a wooden table
A step by step guide to using your keycap mold 3D print
Crafting custom keys at home requires patience rather than industrial machinery. By utilizing a simple keycap mold 3D print setup, you can easily turn liquid resin into a solid piece of desktop art. Here is the exact, step-by-step workflow to help you achieve perfect results on your first try
Step 1: Prep the Casting Mold
Your plastic mold setup must be completely free of dust and debris before you begin the casting process. Use a dry cotton swab to rub a microscopic layer of Vaseline evenly inside the entire cavity and around the alignment pins. This simple step ensures that the hardened resin will release smoothly without tearing your DIY tools apart.
Step 2: Mix Your Resin by Hand
Measure your two-part epoxy resin using an exact 1:1 ratio by volume into a disposable plastic cup. Stir the mixture slowly with a wooden stick for exactly three minutes while scraping the sides and bottom of the cup. Keeping your stirring motion gentle prevents excess air from forming unwanted micro-bubbles before the liquid is poured into your keycap mold 3D print.
Step 3: Add Colors and Pour
Incorporate your favorite liquid pigments or fine glitters into the clear mixture to create a truly custom design. Carefully pour the colored resin into the bottom half of the mold until it forms a small dome over the rim. Allowing the resin to slightly overflow guarantees that the entire cavity is packed with no hollow spots.
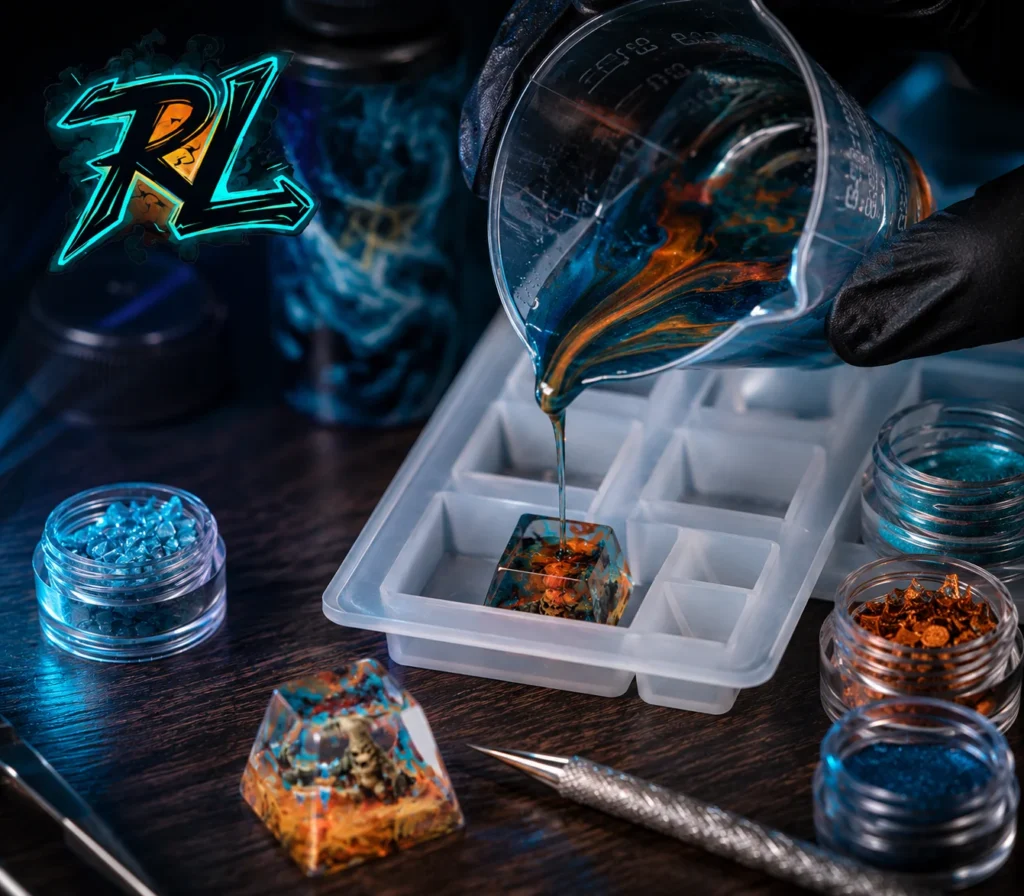
Keycap Mold 3D Print: Carefully pouring colored liquid resin into a keycap mold 3D print on a crafting table
Step 4: Press and Secure the Mold
Align the top half of your keycap mold 3D print containing the cross-shaped stem and press it straight down into the resin base. Squeeze the two pieces together firmly to force out the excess resin through the built-in escape channels. Wrap a strong rubber band around the assembly to maintain pressure and let it cure undisturbed for 24 hours.
Step 5: Demold and Sand Clean
Gently pry the top and bottom pieces of the mold apart to reveal your new handmade artisan keycap. Use a small pair of nippers to trim away the thin flashing of excess plastic left behind around the bottom edges. Finally, rub the bottom rim against a piece of 800-grit sandpaper to ensure your new creation sits perfectly flush on your keyboard switch.
See more: Stitch Surfing Sa Keycap – A Masterpiece of Handcrafted Resin and Intricate Miniature Art
Discovering jaw dropping visuals for your resin creations
Choosing the right character concept can easily kickstart your crafting journey. You do not need expensive factory machinery, as combining a basic keycap mold 3D print with simple handheld painting can yield beautiful resin art pieces. Here are four popular pop-culture designs inspired by actual artisan creations that you can try making today
Mystical Landscape (Appa V2 Keycap V2)
This charming design captures the beloved flying bison resting peacefully amidst a vibrant, mystical landscape. Inside the crystal-clear resin structure, the miniature Appa V2 Keycap V2 figurine is securely embedded among floating green and blue moss-like elements. To achieve this stunning depth, simply arrange tiny pieces of dyed preserved moss or miniature flora around the character model before pouring.
This thoughtful arrangement creates a stunning deep-sea or sky-island illusion that shifts beautifully depending on the light angle. Crafted within the precise boundaries of your keycap mold 3D print, the entire composition adds an immense sense of depth and truly comes alive when illuminated by your keyboard’s RGB backlighting.
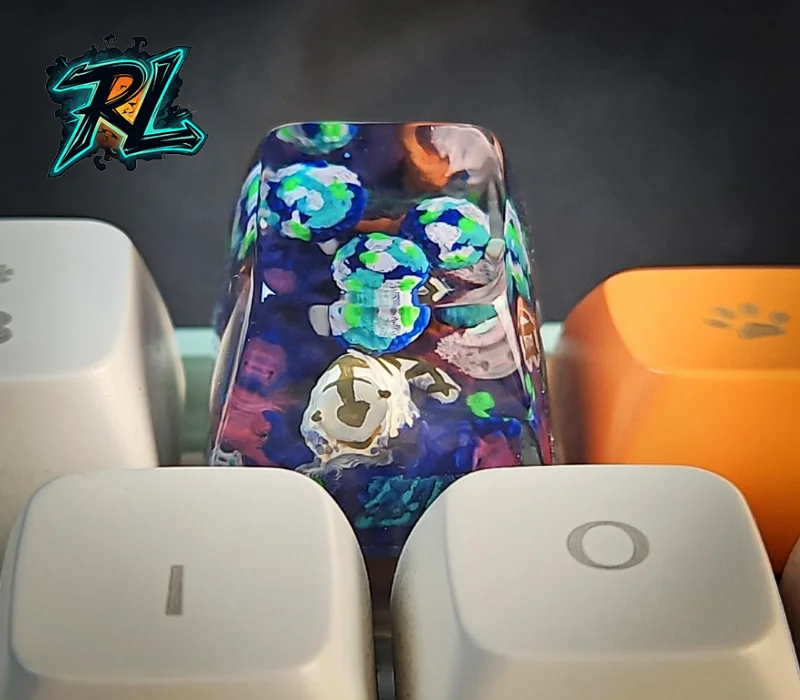
Keycap Mold 3D Print: A clear resin artisan keycap featuring a miniature Appa figurine surrounded by blue and green moss elements
Vibrant Tropical Island (Stitch Keycap)
This vibrant concept features the iconic blue alien sitting on a textured, colorful tropical island terrain. The interior environment is packed with lively details including tiny handmade polymer clay mushrooms, exotic plants, and a small yellow creature resting right beside him. You can sculpt this uneven, rocky mountain base using clay or dense foam and paint it with acrylics to ensure it fits perfectly inside your keycap mold 3D print.
Using high-clarity clear resin allows every small painted element on the mossy hill of the Stitch Keycap to stay perfectly visible. This crystal transparency ensures that the playful atmosphere and the highly detailed storytelling of the miniature scene can be admired from any viewing angle without distortion.
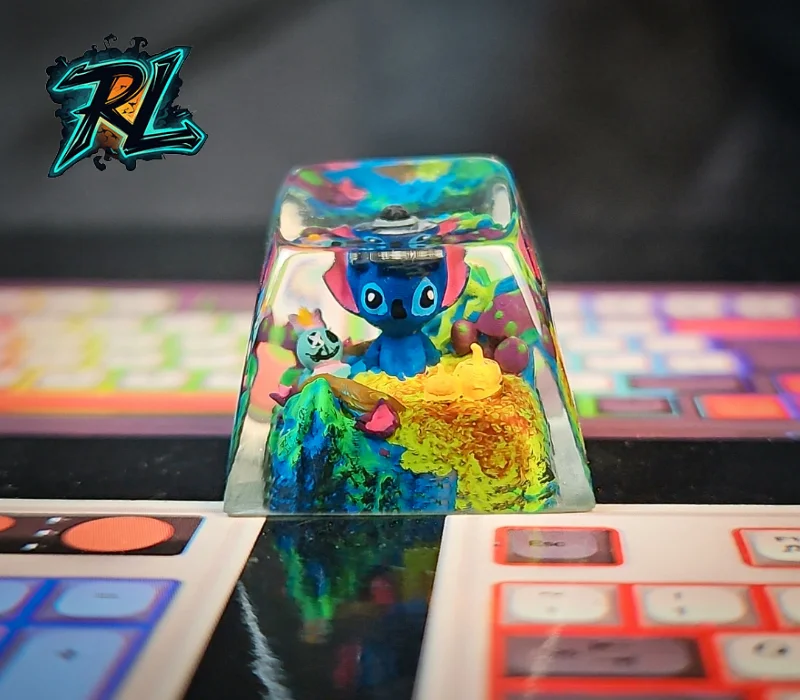
Keycap Mold 3D Print: A miniature blue Stitch figurine sitting on an uneven rocky mountain base with tiny handmade polymer clay mushrooms and exotic plants inside clear resin
Frozen Ocean (Scrat Ice Age Keycap)
The Scrat Ice Age Keycap is a dynamic concept that freezes a hilarious and nostalgic prehistoric moment inside a glossy resin cube. The desperate saber-toothed squirrel is depicted scrambling over realistic, icy white and deep blue ocean waves while chasing his prized acorn. This particular layout requires extreme precision when placing the figurine to ensure it looks like it is bursting through the freezing water.
Crafting this piece requires pouring a textured, semi-opaque blue resin base first to establish the churning water and crashing wave effect. Once the colorful arctic foundation sets and cures slightly, you can carefully position the character figure and seal it completely with a transparent, UV-resistant top layer to lock in the action.
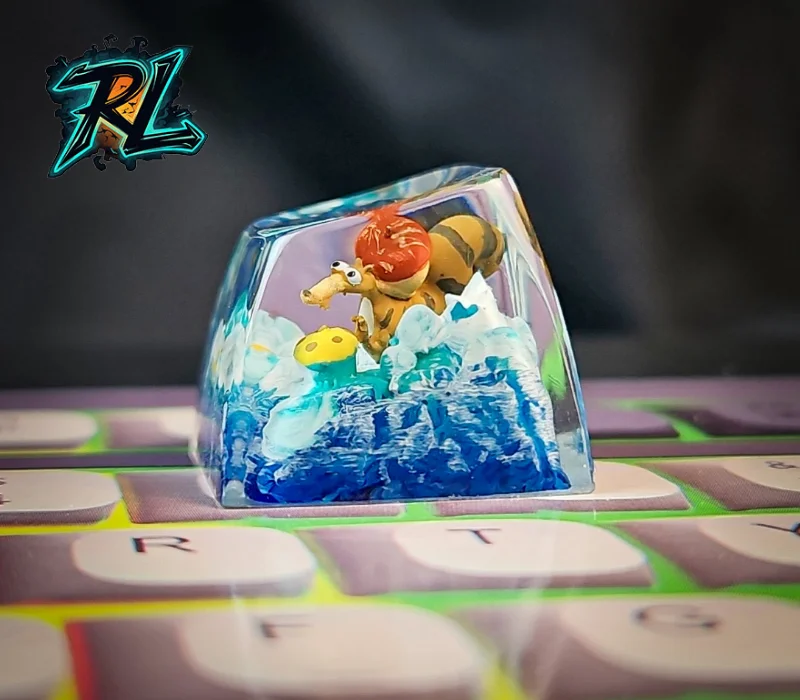
Keycap Mold 3D Print: A dynamic layout of a desperate saber-toothed squirrel scrambling amidst realistic churning arctic water and crashing white waves inside a resin cube
Sinister Altar (Overlord Keycap)
For dark fantasy fans, this design showcases the majestic skeleton ruler Ainz Ooal Gown at the center of a sinister altar. The character figure from your keycap mold 3D print is highly detailed with his iconic dark blue robes and glowing red eyes. Painting these tiny skeletal hands and intricate lines requires a steady hand and a fine-tip brush.
He stands on a rich, textured crimson and purple crystalline base that grounds this legendary Overlord Keycap perfectly. This darker, bleeding color palette successfully mimics a swirling, dark magical aura or a pool of dark energy frozen forever inside the clear resin dome.
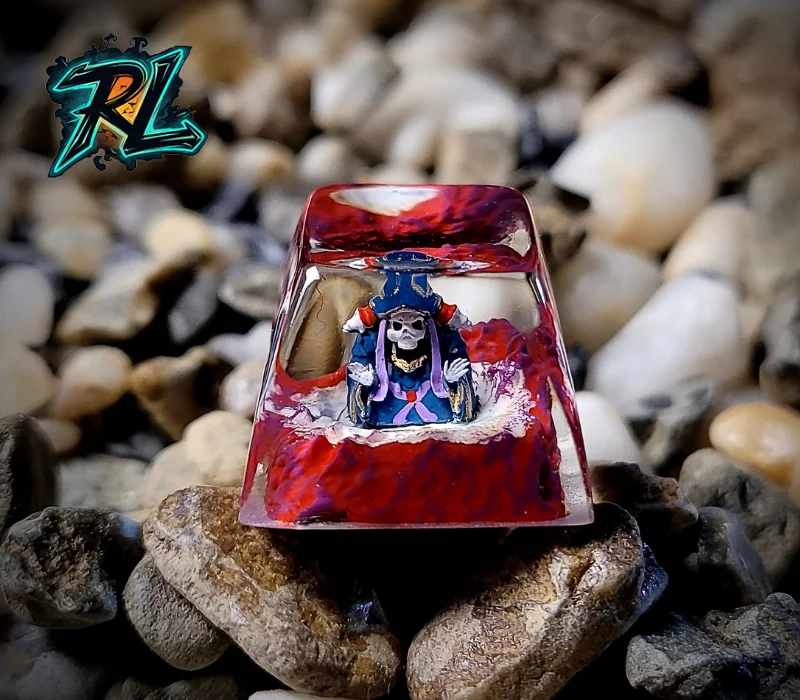
Keycap Mold 3D Print: The iconic Overlord skeleton king figure with glowing red eyes surrounded by a frozen pool of dark purple and crimson energy under a transparent layer
Resin Lamp LLC | Illuminating Your Creative Space
When you choose Resin Lamp LLC, you are investing in a premium experience from the initial design to the final unboxing. We take immense pride in merging top-tier artisan creation with a modern, stress-free fulfillment process designed for collectors worldwide.
- Masterful Artisan Craftsmanship: Every single piece from Resin Lamp LLC is meticulously handcrafted by skilled artisans who pour their passion into perfecting every microscopic detail and color blend.
- Rapid 7 to 10 Day Shipping: Your custom orders are processed efficiently, ensuring your package is securely dispatched and delivered to your doorstep within just 7-10 days.
- Professional Worldwide Delivery: We partner with leading global logistics providers to offer a highly professional shipping experience, tracking your order every step of the way.
- Shipping Anywhere You Need: No matter where you are located in the world, our extensive distribution network guarantees safe and seamless delivery to any destination.
Whether you’re searching for a stunning resin lamp, anime-inspired decor, or a personalized gift, Resin Lamp LLC is here!
Contact us:
📧 resinlampart@gmail.com
🌐 https://resin-lamp-llc.com/


